![[New] 2024 Approved Enhance Audio-Visual Fidelity Use AV1 on YouTube](https://thmb.techidaily.com/e43b0bc66a6afa452744238286fc0843b9dfd431ddd2cd63d446736a0115992b.png)
"[New] 2024 Approved Enhance Audio-Visual Fidelity Use AV1 on YouTube"
Enhance Audio-Visual Fidelity: Use AV1 on YouTube
Do you notice that many YouTube videos have been streamed in AV1? YouTube AV1 just happened suddenly a few years ago. This article will inform you about all the things you want to know about AV1 Youtube settings. I will let you know the tutorial to turn in AV1 settings on YouTube and the reason why should choose AV1 along with the others, and some more things about AV1.

Part 1: How to turn on AV1 settings on YouTube?
Do you wonder how to turn on AV1 settings on YouTube? For your information, AV1 is a video codec that is developed by a consortium of companies. It offers you advanced compression, enabling you to do smoother HD streaming and data savings for the video. Google also has already implemented AV1 use on YouTube. To turn on AV1 settings on YouTube, here are the steps:
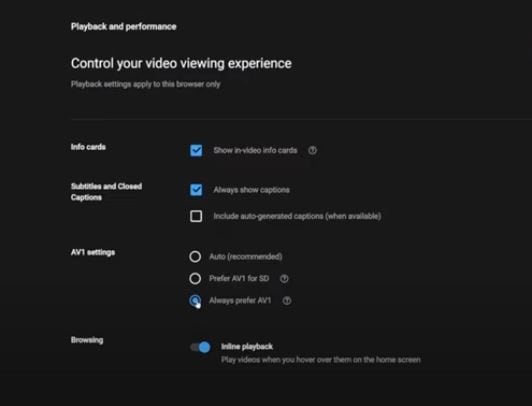
Step1Go to playback and performance
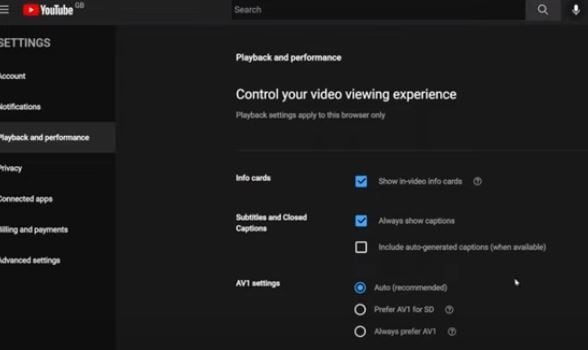
- To turn on the AV1 settings, go to your YouTube account, after that click “Playback and Performance”.
- In the AV1 settings. Besides “Auto (Recommended)”, there are other two options, which are “Prefer AV1 for SD” and also “Always prefer SD”.
- “Always Prefer AV1” uses the codec whenever it is available for a video while “Prefer AV1 for SD” limits it to SD videos. There are two options to avoid low-performance devices when AV1 videos are played on YouTube. You can select “Always Prefer AV1” to see if your device performance is good enough when you play videos on YouTube that support AV1.
Step2Test if the AV1 settings are already enabled in your video
You may ask how to confirm your YouTube videos are playing with AV1 Codec. Well, you can search playlist on YouTube with the keywords “4K, 5K, and 8K videos with the new AV1 Codec “. You can test it by playing one of the videos. You have to right-click on the media player and then select “Stats for nerd”. If it shows the av01 codec there, then the AV1 settings are enabled already.

Part 2: Why choose AV1 over VP9 and other formats?
Now, do you need a reason why you should choose AV1 compared to VP9 and the others? As you know, there is also another video codec like VP9. There are also the others such as VVC, and many more. So what is the superiority of AV1 over the others? I will let you know why you should choose AV1 in this part.
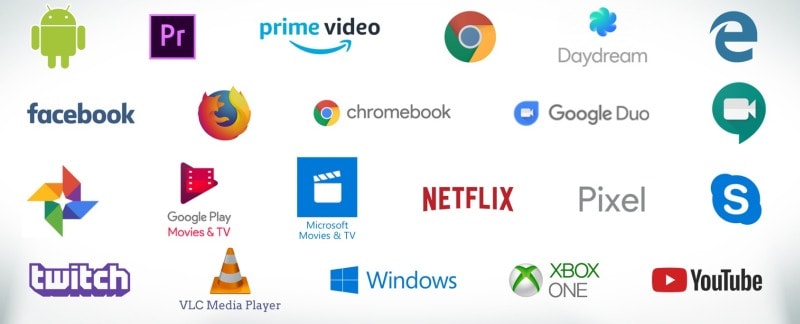
The main thing is, as mentioned before, AV1 is developed by a consortium of companies founded in 2015. It is supported by The Alliance for Open Media (AOMedia) such as Amazon, Facebook, Google, Microsoft, and Netflix, and also by web browser developers and semiconductor firms. Aomedia made it clear the algorithm is free-to-use. It means that there are no greedy negotiators that will be dependent on the developers.
Also, these days, with a format that provides a much smaller workload for internet providers. Their today focus is, that AV1 can reach the quality but can get the job done with 20% more efficiency. Then, with AV1 encoding, a “standard” 4K movie will be much more accessible than it is now. These are some more reasons why you should choose AV1.
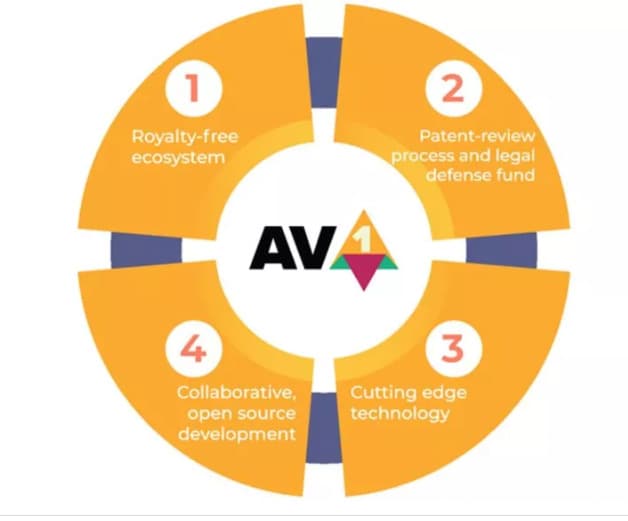
1. Royalty-free
As mentioned before, AV1 is royalty-free. AV1 is such a next-generation of royalty video codec. It means that it is not just free to use, but also free of charge, obligations, or even liability. It is an open and royalty-free video codec that the video platform will not charge to pay royalties to the Moving Picture Experts Group (MPEG), the developer of video codecs.
When it comes to the group that will ask for the royalty, MPEG is not the only one. There are also other patent groups and companies that can ask for it. Aomedia integrated Google, Mozilla, and Cisco, while they were busy creating their new video codec. However, the three companies joined together to create one codec to beat them all.
2. Better performance
It is said that the AV1 codec is 30% more efficient. According to the tests conducted by Moscow State University, AV1 can outperform AV1 by about 28% in the efficiency of encoding and decoding. As per the performance graph from the Graphics & Media Lab Video Group, MSU below, AV1 can offer the exactly same quality as X264 at 55% of the average bitrate.
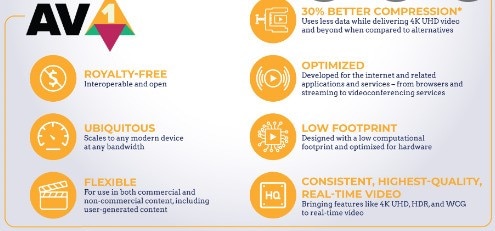
AV1 is designed so exclusively to function better than all the other codecs in the market. It is an open-sourced codec with simple patent licensing, and the integration manages to save, as mentioned, up to 30% of the bandwidth for the exactly same image quality. In other words, with AV1, distributors can send streams much faster and cheaper and we can enjoy higher definitions in the same bandwidth.
3. AV2 to come in the future
AV1 is undoubtedly superior if we compare it to other available video codecs and the exploration of the codec technology AV2 has already begun. This is such an early performance evaluation. There is some interesting part of the exploration development of AV2, such as multiple line selection for Intra prediction can make you select not just neighboring row/column for directional prediction. The same tool also exists in VVC.
There are also three essential improvements, which are simplifying the existing feature (also complete removal) and picking the tool used by VVC/H.266 (It is lack originality but so much work on it) and improvement periodically improvement of an existing tool, it is too few and also not original. We haven’t known yet when AV2 will be done completely though, maybe there still be some more essential improvements.
Part 3: What’s the best video editor for YouTubers with AV1 format?
When we talk about YouTube, it feels incomplete if we don’t talk about the video editor. So, what is the best video editing software for YouTubers with AV1 format? Yes, it is Filmora . It is such a great video editing software that allows you to import and edit many video file formats. Filmora also allows users to export AV1 MP4 format video and then can directly upload it to YouTube.

Filmora gives some ways to export your videos. Here are the five ways. You can also customize the export settings then you can save them to reuse the same settings next time. The first is you can export your project file and video to the local computer. It supports export as MP4, AVI, WMV, AV1, MOV, GoPro Cineform, F4V, MKV, TS, and 3GP.
After that, you can export your video to any device you want, such as iPhone, iPad, Apple TV, Apple TV 4K, iPod, Samsung Galaxy, Smart Phone, Android Generic, Google Pixel, Xbox One, PlayStation 4, PSP, and Smart TV. Then you can upload it to YouTube, Filmora provides you to export your video to Youtube directly. All you need to do is logging your Youtube account and export.
Free Download For Win 7 or later(64-bit)
Free Download For macOS 10.14 or later
Part 4: FAQ: Does YouTube use AV1 or VP9?
For today, YouTube encodes all the videos with the VP9 codec, but for some reason displays for low view count videos. AV1 usage also had been pushed to very low view counts. When it comes to cost or quality tradeoffs, AV1 took about 18 times longer to encode than x264.
Selective MP4 Editing Made Simple on Mac
What is the Best MP4 Cutter for YouTubers On Mac?

Liza Brown
Oct 26, 2023• Proven solutions
Editing videos is a big part of YouTubers’ job including cutting MP4, customizing intros and outros, grading video colors, adding a multitude of effects, and many more. All YouTube celebrities use a diverse set of video editing features such as filters, transitions, custom titles and captions, and overlays.
These post-processing effects ensure that their videos don’t only look aesthetically pleasing but are more engaging and interactive to keep their viewers hooked from the beginning right till the end. This is exactly why cutting MP4 videos and editing have become monumentally significant for newcomers.
Having said that, most of the beginners and hobbyists either can’t afford or want to pay for professional video editing software for cutting MP4 such as Adobe Premiere or Final Cut Pro. In this time, FilmoraX will be a better choice to cut MP4 for Youtube
Before we further delve into the details of advanced video cutter functions, let’s first develop an understanding of the basics.
Section1. Basic Video Cutter Functions
Section2. Advanced Video Cutter Functions
Section 1. Basic Video Cutter Functions
These are the features of cutting MP4 videos that are used by almost all of the YouTuber to give their videos a more engaging look and contextualize them based on the content. For instance, almost all of the YouTubers use customized captions and titles to share information that is highly valuable for the viewers and enables them to develop a connection with the YouTuber.
Almost all of the YouTubers have customized intros and outros in their videos but some of the notable names include MKBHD, PewDiePie, and Smosh. In the process of cutting MP4 videos, they add these effects to create a brand for themselves.
One of the most basic functions of cutting MP4 or other videos intended for YouTube audiences is to add your intro and outro.
- Intro - It is a customized beginning where YouTubers usually add their channel name or its logo along with the title of the video. This helps them to develop a personal brand and add context to what their audience is about to see.
- Outro - It is the customized ending of the video where most content creators choose to add a call to action (CTA) encouraging them to engage with the channel or the video in some manner. For example, they may add an outro that asks the users to subscribe to the YouTube channel.

These are customized stickers, captions, and titles that enable YouTubers to add contextual information at any point in the video to add more value to their content during the process of cutting MP4 videos. For example, if a YouTuber is running a smartphone review channel, they can add rich stickers that contain specifications of the smartphone for those who are interested in particulars.
Including such information, while cutting MP4 also adds to the credibility of the content creator as they are perceived as more professional and dedicated to their job.

Steps to Perform Basic Video Cutter Effects on Filmora X
Here’s how you can add intros and outros to your YouTube videos using Wondershare Filmora X for cutting MP4 videos.
- Add intro background and select your favorite audio or sound effect
- Add your logo and/or text to the intro video
- Now add cool effects to improve the appearance of your intro
- Export your intro video and add it to shared media
You can also use Filmora templates for cutting MP4 videos to create your intro video for your YouTube content.
In Filmora, you will find a wide variety of templates for titles, openers, end credits, plain texts, callouts, and more for cutting MP4 and other video formats. You can use the premade template to add the desired text effect and then edit them according to your preferences. If you want to use these settings again, save the customized text effects as presets. It will save you a lot of time.
Section 2. Advanced Video Cutter Functions


These are the cutting MP4 effects that aren’t used by beginners but hobbyists and professional video content creators may use them to add production value and interactive dimension to their content.
- Green Screen - This effect allows YouTubers to add any type of live or static background while cutting MP4 videos adding production value to their video.
- Motion Tracking - This is a cinematic method that enables YouTubers to include digital visuals in live-action video. It ensures that everything including scale, position, relative motion, and orientation is accurate.
- Color Matching - If you are shooting your video with different cameras, every camera records the footage in its own color profile. Color matching is used to introduce color consistency throughout the video. Filmora X is perfectly capable of handling color matching while you are cutting MP4 and other videos.
Some of the channels and YouTubers that rely on advanced video cutting MP4 effects include Vlad and Niki, MKBHD, Dude Perfect, Canal KondZilla, Like Nastya Vlog, and Kids Diana Show.
Performing Advanced Cutting MP4 Video Effects on Filmora X
Step 1 - Set up and position the green screen and add adequate lighting.
Step 2 - Make sure that you don’t wear anything that’s green and start shooting.
Step 3 - Download green screen backgrounds from the website of your choice.
Step 4 - Import your green screen footage into Filmora X and adjust the settings according to your preferences.
Step 5 - Position the background-clip so it looks natural and then export the video in your required format (MP4).
Step 1 - Go to Behaviors in Control Panel and select the top clip. Then click on the “plus” button right next to Behaviors.
Step 2 - Here, select the motion track from the list and open the folder to select the footage you want to track.
Step 3 - This will automatically start motion analysis of the video clip and you’ll be notified with grey tracker points once the analysis is complete.
Step 4 - You can draw around the region that you want to follow the motion and it will be automatically applied to the object.
Step 5 - Preview the clip and adjust any settings if the result isn’t according to your liking.
Step 1 - Drag the video clip to your timeline and move the play head to the frame you want to color match.
Step 2 - Select the remaining video clips and apply color matching through the right-click or the toolbar. Select the frame as a reference and click on ‘Match’.
Step 3 - Now, using the slider, adjust the extent to which you want the color setting of other clips that need to be matched. See the result in the ‘comparison view’.
Final Word
Cutting MP4 or other videos for YouTube content creation is a major part of the process. You need to have reliable and versatile video editing software that can get the job done without any hassle. And while there are professional packages available, they cost way too much for the YouTubers who are just starting out or are just hobbyists. That’s where Filmora X can be an exceptional alternative offering a wide variety of features at a fraction of the cost.
You can tryFilmora X for free for cutting MP4 videos before you pay for the fully-featured software.
You May Also Like:How do Beginners Make a Cool Video for YouTube on Mac>>>
Liza Brown
Liza Brown is a writer and a lover of all things video.
Follow @Liza Brown
Liza Brown
Oct 26, 2023• Proven solutions
Editing videos is a big part of YouTubers’ job including cutting MP4, customizing intros and outros, grading video colors, adding a multitude of effects, and many more. All YouTube celebrities use a diverse set of video editing features such as filters, transitions, custom titles and captions, and overlays.
These post-processing effects ensure that their videos don’t only look aesthetically pleasing but are more engaging and interactive to keep their viewers hooked from the beginning right till the end. This is exactly why cutting MP4 videos and editing have become monumentally significant for newcomers.
Having said that, most of the beginners and hobbyists either can’t afford or want to pay for professional video editing software for cutting MP4 such as Adobe Premiere or Final Cut Pro. In this time, FilmoraX will be a better choice to cut MP4 for Youtube
Before we further delve into the details of advanced video cutter functions, let’s first develop an understanding of the basics.
Section1. Basic Video Cutter Functions
Section2. Advanced Video Cutter Functions
Section 1. Basic Video Cutter Functions
These are the features of cutting MP4 videos that are used by almost all of the YouTuber to give their videos a more engaging look and contextualize them based on the content. For instance, almost all of the YouTubers use customized captions and titles to share information that is highly valuable for the viewers and enables them to develop a connection with the YouTuber.
Almost all of the YouTubers have customized intros and outros in their videos but some of the notable names include MKBHD, PewDiePie, and Smosh. In the process of cutting MP4 videos, they add these effects to create a brand for themselves.
One of the most basic functions of cutting MP4 or other videos intended for YouTube audiences is to add your intro and outro.
- Intro - It is a customized beginning where YouTubers usually add their channel name or its logo along with the title of the video. This helps them to develop a personal brand and add context to what their audience is about to see.
- Outro - It is the customized ending of the video where most content creators choose to add a call to action (CTA) encouraging them to engage with the channel or the video in some manner. For example, they may add an outro that asks the users to subscribe to the YouTube channel.
These are customized stickers, captions, and titles that enable YouTubers to add contextual information at any point in the video to add more value to their content during the process of cutting MP4 videos. For example, if a YouTuber is running a smartphone review channel, they can add rich stickers that contain specifications of the smartphone for those who are interested in particulars.
Including such information, while cutting MP4 also adds to the credibility of the content creator as they are perceived as more professional and dedicated to their job.
Steps to Perform Basic Video Cutter Effects on Filmora X
Here’s how you can add intros and outros to your YouTube videos using Wondershare Filmora X for cutting MP4 videos.
- Add intro background and select your favorite audio or sound effect
- Add your logo and/or text to the intro video
- Now add cool effects to improve the appearance of your intro
- Export your intro video and add it to shared media
You can also use Filmora templates for cutting MP4 videos to create your intro video for your YouTube content.
In Filmora, you will find a wide variety of templates for titles, openers, end credits, plain texts, callouts, and more for cutting MP4 and other video formats. You can use the premade template to add the desired text effect and then edit them according to your preferences. If you want to use these settings again, save the customized text effects as presets. It will save you a lot of time.
Section 2. Advanced Video Cutter Functions
These are the cutting MP4 effects that aren’t used by beginners but hobbyists and professional video content creators may use them to add production value and interactive dimension to their content.
- Green Screen - This effect allows YouTubers to add any type of live or static background while cutting MP4 videos adding production value to their video.
- Motion Tracking - This is a cinematic method that enables YouTubers to include digital visuals in live-action video. It ensures that everything including scale, position, relative motion, and orientation is accurate.
- Color Matching - If you are shooting your video with different cameras, every camera records the footage in its own color profile. Color matching is used to introduce color consistency throughout the video. Filmora X is perfectly capable of handling color matching while you are cutting MP4 and other videos.
Some of the channels and YouTubers that rely on advanced video cutting MP4 effects include Vlad and Niki, MKBHD, Dude Perfect, Canal KondZilla, Like Nastya Vlog, and Kids Diana Show.
Performing Advanced Cutting MP4 Video Effects on Filmora X
Step 1 - Set up and position the green screen and add adequate lighting.
Step 2 - Make sure that you don’t wear anything that’s green and start shooting.
Step 3 - Download green screen backgrounds from the website of your choice.
Step 4 - Import your green screen footage into Filmora X and adjust the settings according to your preferences.
Step 5 - Position the background-clip so it looks natural and then export the video in your required format (MP4).
Step 1 - Go to Behaviors in Control Panel and select the top clip. Then click on the “plus” button right next to Behaviors.
Step 2 - Here, select the motion track from the list and open the folder to select the footage you want to track.
Step 3 - This will automatically start motion analysis of the video clip and you’ll be notified with grey tracker points once the analysis is complete.
Step 4 - You can draw around the region that you want to follow the motion and it will be automatically applied to the object.
Step 5 - Preview the clip and adjust any settings if the result isn’t according to your liking.
Step 1 - Drag the video clip to your timeline and move the play head to the frame you want to color match.
Step 2 - Select the remaining video clips and apply color matching through the right-click or the toolbar. Select the frame as a reference and click on ‘Match’.
Step 3 - Now, using the slider, adjust the extent to which you want the color setting of other clips that need to be matched. See the result in the ‘comparison view’.
Final Word
Cutting MP4 or other videos for YouTube content creation is a major part of the process. You need to have reliable and versatile video editing software that can get the job done without any hassle. And while there are professional packages available, they cost way too much for the YouTubers who are just starting out or are just hobbyists. That’s where Filmora X can be an exceptional alternative offering a wide variety of features at a fraction of the cost.
You can tryFilmora X for free for cutting MP4 videos before you pay for the fully-featured software.
You May Also Like:How do Beginners Make a Cool Video for YouTube on Mac>>>
Liza Brown
Liza Brown is a writer and a lover of all things video.
Follow @Liza Brown
Also read:
- [New] 2024 Approved 8 Key Money-Making Moves for YouTube Rookies
- [New] In 2024, Mastering Audio Format Switches SRT to SSA & More
- [New] Infuse Vibrancy YouTube Thumbnails with Neon Borders
- [New] Inside Insights Proclaiming Rights to Free Clip Art Legally
- [New] Techniques and Strategies for Swift Removal of Comments
- [Updated] Beauty Bliss Essential Tutorials for Ultimate Style for 2024
- [Updated] Real-Time Visualizer for 2024
- Guide to Mirror Your Itel A05s to Other Android devices | Dr.fone
- In 2024, How To Pause Life360 Location Sharing For Samsung Galaxy S24+ | Dr.fone
- In 2024, Redefining High Definition with Samsung's UBD K850U Update
- Italy Plunges Into Chaos with Immediate ChatGPT Ban
- Latest Apple Sports App Enhancement: Explore the New Features!
- Personalize Auto-Lock & Screensaver Interval
- YouTube Paid Content Guide Mastering Membership for Monetization for 2024
- Title: [New] 2024 Approved Enhance Audio-Visual Fidelity Use AV1 on YouTube
- Author: George
- Created at : 2024-11-06 05:52:55
- Updated at : 2024-11-13 00:51:20
- Link: https://facebook-video-share.techidaily.com/new-2024-approved-enhance-audio-visual-fidelity-use-av1-on-youtube/
- License: This work is licensed under CC BY-NC-SA 4.0.